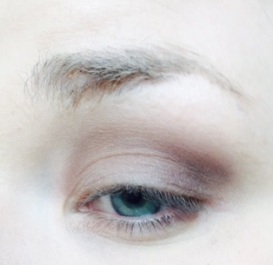
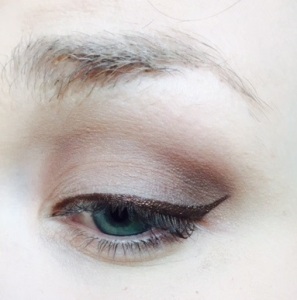
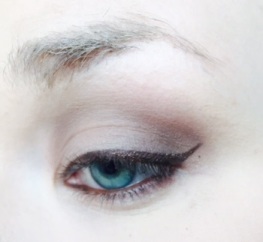
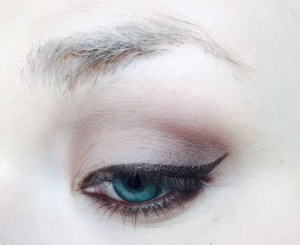
Where have I been?

Hi Guys! I hope you’re all well!

This is a short post, but I just wanted to apologise for my long time away from blogging. I actually had surgery a couple of weeks ago and was hoping to be recovered by now, but there has been some complications which have set me back slightly that has stopped me from actually getting up and doing anything!

I’m still a bit sore, but am hoping to be up and running sometime next week. I’ve got a few ideas (stemmed from sitting around doing nothing!) which I may explore, so please watch this space!

I look forward to sharing ideas with you all soon!

Maria xo

Smokey Eye & Neutral Lips!

Hi lovelies! I hope you’re all having the best Saturday!

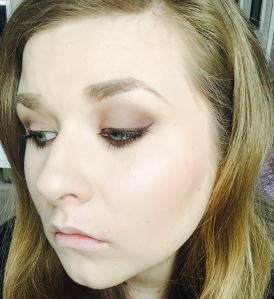
Today I wanted to do a guide-through tutorial with pictures on how to do a quick and easy smoky eye and neutral lips. I hope you enjoy!

So… you need to start out with a good base. At this point, I have cleansed my skin with my Garnier Micellar Water, moisturised with Boots Cucumber Moisturising Lotion and primed my skin with Benefit’s Porefessional. These steps will ensure that your skin is clear, fresh and moisturised and your makeup will stay in place all day!

1 - Blank

Next, move onto foundation. I’ve used Rimmel Stay Matte Liquid Mousse Foundation. I’ve nearly ran out of this stuff and need to buy some more – it’s a great every day, full coverage matte foundation. I stippled this all over my face with my Real Techniques Buffing Brush.

2 - Foundation

After foundation, I like to apply concealer. I’m using MAC Studio Sculpt Concealer in NC20 to highlight under my eyes, my forehead, the bridge of my nose and my chin. I then blend this in with the Real Techniques Buffing Brush that I used for my foundation.

3 -Concealer

4 - Concealer Blended

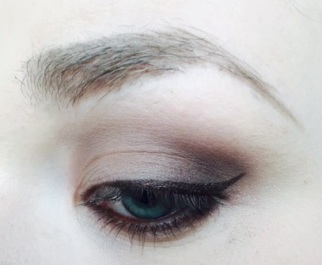
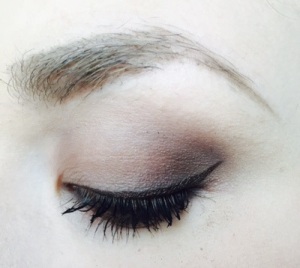
To start off the smoky eye, I’m using a great inexpensive palette that I have from The MakeUp Academy; it’s called Ever After and is a matte palette – great for 90’s inspired looks, which I love! Firstly I take the shade Bare on a fluffy MAC 224 and blend this over the whole lid to ensure I’ve got a smooth, even base. Then on a Real Techniques Base Shadow Brush I take the colour Fade which is a very light brown and sweep this over the eyelid up to the crease.

5 - Eyeshadow base

After that, I take the colour Truffle on the same Base Shadow Brush and make a V shape on the corner of my eye and blend it in with my MAC 24 to ensure there are no harsh lines.

6 - Eyeshadow darker

Once the eyeshadow is done, I’m moving onto eyeliner. Now, sadly my black liquid eyeliner has just run out – such first world problems, so I’ve used my MAC Superslick Liquid Eyeliner in Defiantly Feline which is a chocolatey brown colour with a bit of shimmer in it… I’m actually glad I used this, because it added a slightly more day-time feel to the look and makes a nice change from always wearing black!

7 - Eyeliner

I then took my Rimmel Soft Kohl Kajal Eyeliner pencil in Sable Brown and put this on my water line. I then smudged it out with my MAC Pencil Brush 210 to add a smoky effect.

8 - Under eyeliner

9 - Under eyeliner blended

Right, allow me, because I done these next steps in a really odd way because I then moved onto eyebrows and then went back to Mascara? Anyways… I next filled in my eyebrows as usual with my Anastasia Beverly Hills DipBrown Pomade in Taupe with my Anastasia Beverly Hills 12 Brush and then used Kiko Unforgettable Mascara on my top and bottom lashes.

10 - Eyebrows

11 - Mascara

I then moved back onto my face and applied The MakeUp Academy’s Undress Your Skin Shimmer Highligher to my cheekbones using my Real Techniques Contour Brush and finished my face with my MakeUp Academy Mosaic Bronzer in Natural Glow of which, sadly, the lid has fallen off of 😦

12 - Highlight and Contour

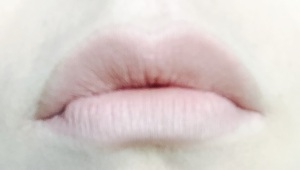
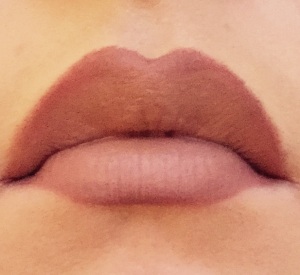
Last but not least, the final step is the lips. There is a pretty heavy eye going on and I didn’t want to kill it, so I’m just using neutral colours for the lips. I started off lining my lips with a Blonde coloured eyebrow pencil because… whatever init, I’m a rebel. Then I filled in the rest of my lips with MAC Honey Love lipstick and… voila! All done!

13 - Lips

14 - Finished Look

Let me know what you think in the comments below! Also, please check out my Instagram! I’ve done some new eye looks on there and I’d love to know what you think! 🙂

Beauty Blogger Award & Liebster Award!

This is a super long post because, unbelievably I’ve been nominated for the Liebster Award and the Beauty Blogger Award!  I feel so lucky and happy!  Thank you to the lovely girls who nominated me… you can find links to their blogs if you keep reading!

liebsteraward

Well, what a lovely surprise, I was nominated for the Liebster Award by the lovely Gianna at Glamorouslyhappythank you Gianna! 🙂

The questions from Glamorouslyhappy:

What is your biggest pet peeve?

I honestly have loads but I couldn’t name them all unless they’re happening right in front of my face. But I guess my overall biggest pet peeve is people being negative about everything. You know, those people who wake up in the morning and say “oh, I hate my life, I hate my job, oh look it’s raining outside what a disaster, why does the universe hate me so much” etc. etc. These people are in charge of their own happiness and if you keep being negative and not changing the things you hate in your life, then it’s never going to change. Plus, negative people just absolutely suck the life out of the positive people.

What is your favorite thing to eat?

I love Japanese food. From Sushi to Ramen, it’s all good!

Who is your celebrity crush?

I used to have the craziest crush on Paolo Nutini for years… bordered on obsession! These days, Gerard Butler/Channing Tatum/Tom Hardy!

Would you rather be rich and unhappy or poor and happy?

Cliché, but definitely poor and happy. No matter how rich you are, if you are unhappy you are the poorest of them all.

What do you like to do in your free time?

It depends what kind of mood I’m in! I love sitting indoors watching TV but I also love going for coffee or drinks with my friends and having a really good catch up! And, of course, blogging!

If you could go back in time, what advice would you give your younger self?

Don’t worry about what everyone else thinks of you. In time, the people who really matter will still be in your life and the people that make you unhappy will not.

What is the first thing you would buy or do if you won the lottery?

Give up work! Ha! After doing a few laps of the house, I would probably book a massive 6 month holiday and travel the world. Then I would come back and buy a beautiful apartment in the Docklands of London!

Who is your hero and why?

Can I have three? 😀

My Mum. She is such a big inspiration for me; she’s such a strong woman and having been through so much, she’s still smiling. She has a fantastic career, is always there when I need her, without hesitation, and I could never, ever wish for a better Mother.

My Dad. Funniest man I will ever know. Never fails to make me laugh and he doesn’t worry about the little things in life. He is always coming up with amazing bright ideas about his hopes and dreams and what he wants to do and I find it amazing that he has so much spark!

My sister, Louisa. We argue like nothing else, even as grown adults (!) but she is always there for me and I know she would give me her last penny if I needed it. Even if it doesn’t always seem like I do, I always look up to her.

What is your dream job?

To be a make-up artist. Always.

What made you start a blog?

Sometimes I have so many ideas bursting out of my head that I just need to get them out! After watching makeup tutorials and reading beauty blogs since I was a teenager, I thought it was about time I started one. Plus, I absolutely love to write!

I nominate:

devonafayana

Roses beauty blog

The Makeup Journal

Here are the rules:

Thank the person that nominated you and link to their blog.

Answer the 10 questions given by the nominator.

Nominate and link blogs (with less than 200 followers).

Notify the bloggers you have nominated.

Write 10 new questions for your nominees to answer in their blog.

10 Questions for my Nominees:

  1. What was the last picture you took with your phone?
  2. What was your first thought when you woke up this morning?
  3. If you could wake up tomorrow in the body of someone else, who would you pick and what would you do?
  4. If you could only have one meal for the rest of your life, what would it be?
  5. What is the longest you have gone without sleep?
  6. Name your worst habit!
  7. What is your worst fear?
  8. Tell us something about you that we don’t know!
  9. Where is your dream destination for a holiday?
  10. If you had to be trapped in a TV show for a month, which show would you choose?

I can’t wait to read your responses!
beautybloggeraward

Unbelievably, I was nominated for another award – the Beauty Blogger Award – this time by the amazing Tamira at beautybytami! Thank you lovely! 🙂

RULES:

  1. Tag the person who nominated you.
  2. Answer the questions you were given.
  3. Nominate 10 people who’s blog is about beauty or fashion.
  4. Make 10 questions for your nominees to answer.
  5. Inform the people you chose that they have been nominated!

The Questions from beautybytami:

Tell me something we don’t know about you!

I went to University for a whole year to study Politics but decided to leave to go to work instead.

Favorite current high end product?

I wouldn’t say it’s majorly high end, but MAC Studio Sculpt Foundation will always be a favourite.

What is the craziest thing you’ve ever done?

I’ve never done anything majorly crazy, but there are a few minor crazy things. I’ve driven to Blackpool from London at 1am before on a whim (about a 5 hour drive) in the absolute torrential rain. I’ve also gone to a club and sneaked into the back staff break room, sat on their sofa and pretended like I was supposed to be there to all the staff… got away with it as well.

Where do you work?

I work in London as a Recruitment Consultant – far from the makeup world!

Do you have any little furry friends? What are their names and what kind of pet?

Yes, I have a dog, she is a black Cocker Spaniel called Lola J

Your absolute DREAM car?

I’m not massively into cars, but I wouldn’t mind an Audi R8.

Would you give up putting on makeup for a full month if you were offered a $100 gift card to your favorite cosmetics brand for doing so? (You could use it after the month is over)

Absolutely, categorically, no. Haha, 30 days of torment would not be worth $100. Sorry.

What is your background? Ethnicity, family etc…

I am White British. I have an Irish surname so I asked my Dad once where we are from originally and he just repeatedly said “Stepney” until I got the picture. (Stepney is an area in East London – popular for it’s Cockneys!) So as far as I know, I’m just a Londoner.

One food you HATE?

Celery. End of.

What is on the top of your bucket list?

To go to Kyoto, Japan and see the Geisha. And I actually finally get to go next year in April! Excited is an understatement.

My Questions:

  1. What is your favourite lip colour?
  2. What is your favourite clothes shop?
  3. How often do you wear makeup?
  4. Long nails or short nails? Why?
  5. What is your favourite time of day?
  6. What has been the best day of your life so far?
  7. Who is your biggest inspiration and why?
  8. Do you drive? If yes, what do you drive?
  9. Explain your blog in 3 words.
  10. What is your best piece of advice to aspiring bloggers?

I nominate:

Cogitation Project

Living Vogue

Ladyaah Beauty

I’m so excited to read your answers!
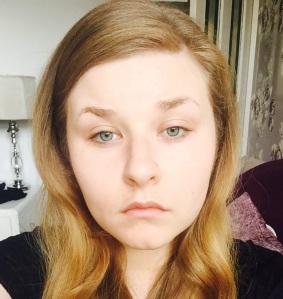
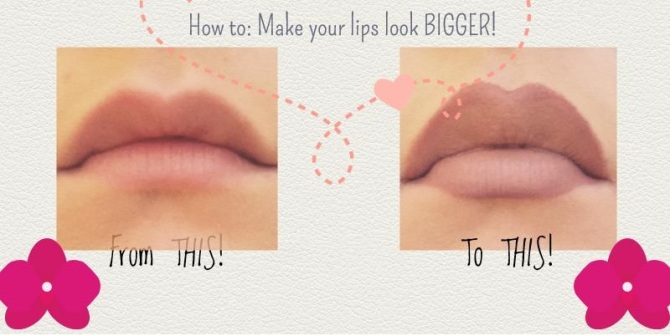
How to make your lips look BIGGER!

Lips bigger poster

This is every girl’s dream, right? To make their lips look full and plump! Well I’ve found a way to make my lips look fuller and plumper without using any lip injections, plumping lipgloss or funky devices that stretch your lips out. I use… makeup!

Yes, it’s true. You can get full, plump lips by just using 3 lip products (2, at a push). Now, I know a lot of girls don’t like the ‘overdrawing’ method, and to be quite honest with you, I don’t either, but this technique overdraws just one tiny little part of your lips and, trust me, I have had no-one say anything to me about how my lips look horrible and overdrawn (maybe they’re chatting behind my back, but who cares?)

Step one:

no lips

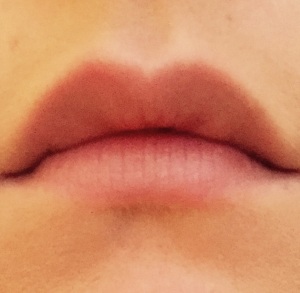
You have a plain old lip.

Step two:

blank lips

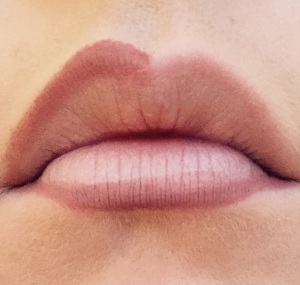
Blank out your lips using some concealer or foundation – this will ensure that the colour you put on your lips is a ‘true’ colour and not the colour of your lipstick mixed with the redness of your lips.

Step three:

half lips

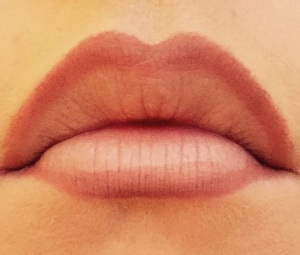
Start lining your lips. This is the key part. Line your lips EXACTLY matching your natural lip line. Then, when you get to your cupid’s bow, overdraw your lip by about 1mm, literally no more than that. Do not extend that overdraw to any other part of your top lip other than the cupids bow otherwise you will start to resemble The Joker.

lined lips

Similarly, you want to overdrawn your bottom lip ONLY at the very bottom centre, again, by about 1mm. Do not extend this overdraw anywhere other than the bottom of your bottom lip.

This will ensure you get the ‘rosebud’ lip effect rather than the ‘Jocelyn Wildenstein’ lip effect.

Step four:

filled lips

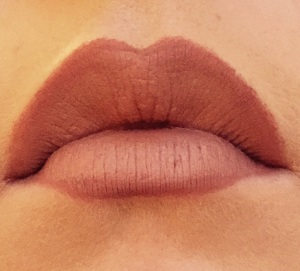
Fill in your lips with a lipstick that is 1-2 shades lighter than your lip liner. I have gone with a matte lipstick, but this is purely personal preference.

Step five:

blended lips

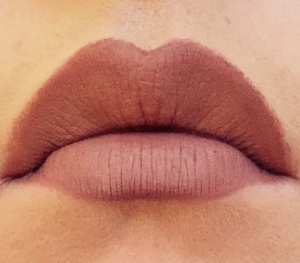
Pick up your liner again and shade/blend your liner with your lipstick s you don’t have a harsh line… you want it to look more like a gradient effect.

Step 6:

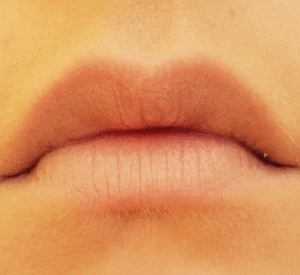
finished lips

This is optional but, I find, effective. Take a really light lip colour, e.g. a foundation colour (or a foundation/concealer will do fine) and put that only in the middle of your top and bottom lips. Don’t put it anywhere else. Then, gently blend the colour in so there is no harsh lines.

And there you have it! Bigger lips in 2 minutes! Feel free to add a lip gloss or whatever you want afterwards, but I prefer a matte look, and it stays for hours!

Let me know your tips and tricks for fuller looking lips!

Products used:

Barbara Daly Lipliner Pencil in Sugar & Spice

MAC Matte Lipstick in Honey Love

MAC Viva Glam GaGa 2 Amplified (I think this was Limited Edition, sorry!)

Tips & Tricks for a Super Speedy Morning Routine!

Running late

Mornings can be a stressful time.  It’s a never-ending guilt trip of deciding to snooze that alarm for 10 more minutes and then leave the house looking like the troll under the bridge.  I know this feeling, however, if you’re like me, I’ve trained myself to get ready in exactly 45 minutes and actually leave the house looking like a decent human being, and that includes having a tea or coffee AND breakfast!

I know what you’re thinking… what is this sorcery? But I’m going to tell you a few things which might just speed up your morning routine and have you feeling fresh, calm and polished.

Firstly, the key to a fast morning routine is preparation. And no, I don’t mean choosing an outfit the night before, lining up your make up in usage order and all that mind-numbing time-consuming stuff. I mean, in your general life, you can make a few changes which will shave vital minutes off your usual morning routine.

  1. Do washing and ironing regularly. I know what you’re thinking… that is seriously boring. But I tell what is worse – running around the house at 7 in the morning using the straighteners to get rid of creases from the dress that has been in the dirty washing for a week.
  2. Separate your “work/school” outfits from the rest of your wardrobe. I don’t mean buy a whole other wardrobe just for this stuff, but keep it to one side in your wardrobe and you will know exactly where all your ‘work appropriate’ stuff is and won’t have to go rooting through every other item of clothing to find something to wear.
  3. Leading on from point 2, ensure that you actually like all of your work/school outfits. It seems silly, but the amount of times in the past that I’ve put on an outfit and felt uncomfortable because it didn’t fit, or I didn’t like it or whatever other reason, is ridiculous. Make sure you have at least 5-10 outfits that fit well, are appropriate and make you feel good. That way, in the morning, when you’re pushed for time, you won’t be stressing about what to wear because ALL of your outfits will be fine!
  4. Keep your make up in the same place! I know it sounds simple but I am really guilty for this. I take out a lipstick or powder or whatever from my makeup case to use for a night out and end up leaving it in that bag. Come weekday morning, I’m hunting around for that product and I can’t find it anywhere. It adds to the stress levels, wastes your time and you will end up feeling a sweaty, late mess. Just put stuff back where it goes and you’ve just saved yourself 10 minutes of looking through every clutch bag you own.
  5. Train yourself to think that your work/school start time is at least 15-30 minutes earlier than it is. This seems stupid, right? But I ALWAYS aim to be at work for 8am, even though I don’t have to start until 8:30am. When I get there at 8am, it’s not an issue, I just make myself a coffee, relax, open my computer and check through the internet or something. When my other colleagues come racing through the door at 8:31am I am relaxed and ready to start my day and they are stressed and red-faced. If, by any chance, I am running really late, I will probably still get there on time or a bit earlier because I’ve given myself that half an hour window. Trust me, this does work.

Now, onto the hardcore stuff… you have failed to prepare and you’ve woken up really late. Every second counts and you need to get out of the front door as soon as possible.

  1. Brush your teeth in the shower. This may save you like 1 minute, but that minute counts!
  2. Don’t wash your hair! If you usually wash your hair in the morning, you may need to curb that this time, you haven’t got time for that! This will save you 10 minutes washing time and, if you’ve got hair like mine (think and frizzy!) 30 minutes blow drying and styling it! Spray some dry shampoo in it, and if you really have to, put it up in a sleek pony tail or bun!
  3. Minimise your make up. You haven’t got time to apply that perfect slick of liquid liner today. You will end up rushing it, it will look a mess and you will have to wipe it off and start your whole face again. My tip: run a black or brown pencil gently on the top of your lash line and smudge it out into a smoky line. It’s much more forgiving and takes a fraction of the time.
  4. Don’t ever NOT shower. I have done this when I’m in a rush and I felt awful all day! I would rather skip every other step than skip this one. Perspective: you’re already late, 2-3 additional minutes in the shower is not going to make a huge difference to how late you are and you will feel fresh all day. Skipping a shower means you’re already late and now you have to spend the whole day smelling like Stinky Pete.
  5. Relax! Ok, you’re late. You’ve jumped out of bed like a ninja and your mind is telling you to run around the house like a headless chicken and get ready as fast as humanly possible.  Don’t!  You’re still half asleep, your thoughts are all muddled and you will probably just extend your getting ready time if you jump straight up and start running around.  Instead, get out of bed, stand up and stretch.  Give yourself 30 seconds to compose your thoughts and think what you’re going to do first in a logical way and then start getting ready.  The more urgent you feel, the more mistakes you will make.  Everything always seems to go wrong when you’re in a rush, right?  Well pretend to yourself that you’re not and everything will go right, trust me!

I hope these tips helped you if you’re always running late, like me!  If you’ve got any tips for when you’re running late, leave them in a comment!

Real Neat Blog Award

Real Neat Blog Award

Hey beauties! I am so proud and honoured to be nominated for the Real Neat Blog Award.  Thank you so much to the amazing Elisabeth at everythingandnothin for nominating me! Her blog is amazing and gives me loads of inspiration – definitely check it out!

Rules for the award:

  • Put the award logo on your blog
  • Answer 7 questions asked by the person who nominated you
  • Thank the person who nominated you, linking to their blog
  • Nominate any number of bloggers you like, linking to their blog
  • Let them know you nominated them (by commenting on their blog etc.)

Elisabeth’s Questions:

  1. What is your biggest fear?

Honestly, spiders. I literally cannot deal with them. If there was a monster in my house and my only means of escape was the back door, and there was a spider in the way of that, I guess I would be eaten by the monster.

  1. Name one beauty item you had high hopes for but it let you down.

Tough one. I always find some use out of a seemingly useless product, but the one that springs to mind is the MAC Pro Longwear SPF10 Foundation. I love MAC products but I really didn’t get on with this one; it didn’t blend in well – it felt like it just sat on top of my skin, irritated my face – especially my eyes, making them water and didn’t ever seem to ‘set’ which meant it rub off on everything. I’ve spoken to friends who have really good reviews for this foundation but I just really didn’t get on with it.

  1. What is your favorite season and why?

May be controversial, but I love Autumn/Winter. I absolutely hate being hot (except for when I’m on holiday). I just find myself getting really agitated and not being able to concentrate. I love the feeling of snuggling up nice and warm, the beautiful coats and scarves that you can buy and the fact that my makeup doesn’t sweat off throughout the day is an added bonus!

  1. Name one thing you have learned from blogging.

To be myself! When I decided to write a blog I was going to write it very factually and impersonally because I thought it would seem more professional and I wouldn’t have anyone judging my personality or little colloquialisms, but half way through my first post, I decided to change this and be myself. I decided that it would relate to anyone who decided to read my blog better and I wouldn’t enjoy it as much if I wrote it in that impersonal way all the time. It’s always best to be yourself!

  1. What is your favorite snack?

You realise I’m a sucker for snacks, right? Ha, this is gonna be tough. I love chocolate but for a snack, I definitely prefer savoury stuff… it’s a tie between two. I love pitta bread and houmous (I actually eat this for lunch all the time) and nachos and guacamole! As you can tell, I love a dip!

  1. Where do you see your blog in 5 years?

Well I would love to say with a million followers and really successful, but honestly, I am so happy right now! I never expected to get here, especially so quickly, so if I maintained what I have now, I would be super happy! I’m just here to write about what I love the most (makeup!) and share my ideas. If that takes me somewhere amazing in 5 years, it would be a massive bonus!

  1. How many days a week do you wear makeup on average?

On average, I would say 6-7 days per week (yes, every day!). I definitely wear it every week day for work and, of course, if I’m going out at the weekend, I will always wear makeup. If I’m having a day in, 80% of the time, I will generally put something on my face, just because I love actually applying makeup!

My Nominees

Too Much Mouth

tailsofthechair

Beauty Bunny

Blended & Beautiful

Confetti and Curves

beautyconfession2

My Questions

  1. Where’s your favourite place to go on holiday?
  2. If you were stuck on a desert island, list 5 things you would NEED to have with you.
  3. What’s your best beauty secret?
  4. What’s your favourite time of day?
  5. What is your favourite social media platform and why?
  6. If you could go back in time to any age, what would it be and why?
  7. Why did you decide to start a blog?

Top Six Summer Favourites… because six is better than five!

Hi! I hope you’ve all had a great Wednesday!

Today I want to introduce you all to my favourite 6 products of the summer so far. It was supposed to be 5 and if I had it my way it would have been, like, 24, so count yourselves lucky!

This is a real mixed bag of products in terms of what they do and the price tag. I love the high end brands (who doesn’t?) but if I can get a real bargain product and it does a great job, why shouldn’t I love that too?

So here it is, my top 6 products!

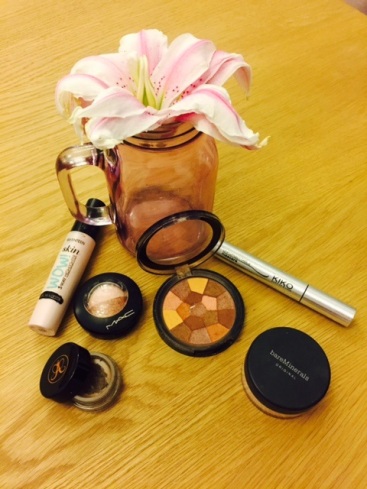
all products

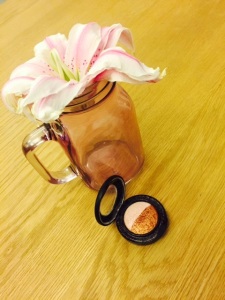
The MakeUp Academy Mosaic Bronzer in Natural Glow

mosaic

I think I’ve mentioned this product in near enough every blog post I’ve done to date and I know you’re probably thinking, “Change the record!” but this product is amazing! I bought it about 2 months ago and have used it every single day and, as you can see, I’ve just hit pan! It was an absolute bargain at around £2… yes, really, £2 and it creates this beautiful ‘Natural Glow’… for real, a product that actually does what it says on the tin. I was very dubious about this at first because the blend of colours that has been used for this mosaic seem slightly weird upon first glance. There is a mixture of brown, yellow, terracotta and purple? But once you swirl them all together on your brush and sweep it on, it makes your skin look radiant and healthy. And you can double it up as individual eyeshadows too! What’s not to love?

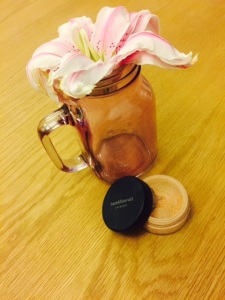
bareMinerals Original SPF 15 Foundation in Medium Beige N20

bareminerals

OK, this was an impulse buy at the airport because I suddenly realised whilst browsing through the Duty Free that I have no bareMinerals products… what is that? So I thought I would give this little baby a go and it hasn’t failed to disappoint! It’s slightly darker than I would have liked it to be, but that is due to my own foolishness at the airport… just came off a week long holiday in the sun… ‘Let’s buy a face product that matches our skin tone now, shall we?’ Great move. This foundation is a mineral powder which blends out to look like actual foundation leaving the skin looking flawless and still, surprisingly dewy-looking which is so bizarre for a powder, but a welcome surprise! Sometimes I apply it on its own as a foundation and sometimes I use it as a powder to set my makeup for super flawlessness.

MAC Spiced Metal Mineralize Eye Shadow

mac eyeshadow

I actually got this product around Christmas time however, never really used it that often until recently, what with the latest strobing craze and what-not. I don’t really often use this as an eyeshadow at all as its very, very glittery and shimmery and doesn’t have a lot of pay off in terms of actual solid colour. But this is why it’s so great for highlighting/strobing! I usually dab my brush into this product really lightly and add it to my highlight areas. It looks so beautiful in the light. I learned with this product, however, that less is definitely more and to avoid the disco ball look, don’t go too crazy!

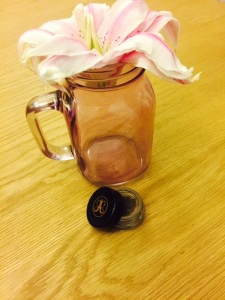
Anastasia Beverly Hills DipBrow Pomade in Taupe

anastasia bh

Where would my life be without this product? In a state of eyebrow crisis, that’s where. I honestly don’t know how I managed without this product my whole life – no wonder there’s so many reviews on it! The texture is amazing, the colour choice is fantastic and it seems to last forever! I’ve used this every single day for the last 7 months and I’ve still got about 2/3 of the stuff left. I highly recommend, if you haven’t got it already.

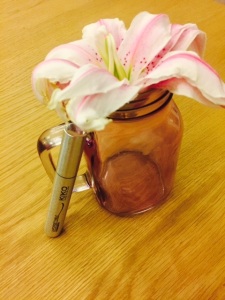
Kiko Unforgettable Mascara

kiko mascara

This is an odd choice and I’m unsure how it’s made it onto my top 6, but when I was looking through my makeup case, I kept coming back to this product time and again. When I first tried this mascara, I was uncertain how I felt about it. It felt almost dry when I first unscrewed it and it felt really stiff when I ran it through my eyelashes, however, it has slowly become one of my favourite mascaras. The reason? That stiffness and dry feeling (the product isn’t actually dry, just really thick) helps push up and curl your lashes because you need to really work it in. I’ve found that my eyelashes look longer, thicker and more curled than my eyelashes have ever looked before from using just one product. I think of it as the hairspray for my eyelashes! If you can get over the initial dry/thick feeling of this mascara, then you won’t be disappointed by the results it gives!

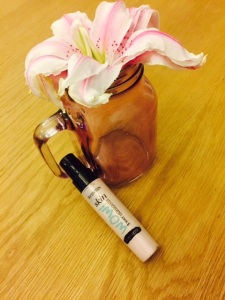
Seventeen Skin WOW! 3 Way Highligher

highlighter

I love this stuff. It’s so versatile, you can use it, literally, however you want. Dependent on how I’m feeling on the day, I will use it as a primer for my skin, adding a glow before I apply my foundation. I will sometimes add it with my foundation and occasionally I add it on top of my foundation to my cheekbones and other highlight areas. Whichever way you decide to use it, it will give you a healthy, glowing complexion.

So there it is… my six summer favourites! Let me know what yours are!

How to feel good without make-up

Make up is a wonderful thing, right? You can go from feeling a 0 to a 10 in a matter of minutes! But what I want to write about today is how to feel like a 10 without wearing an ounce of make-up. And it’s got nothing to do with any miracle product.

This is an interesting post for me because I am the type of person who never used to be able to leave the house without wearing  make-up. I mean, I literally could not go to the corner shop until I’d showered, got dressed up, put on a full face of make-up and done my hair.

Today, I woke up and the first thing I wanted was a cup of tea. But oh, what’s that? No milk? Fantastic.

The old me would have sighed, jumped in the shower and literally moaned to myself for a full hour whilst I got ready for what a normal person would recognise as a night out!

Sound familiar to you?

Now, I’ve been paying close attention to the women I see on the street when I’m out, especially at the weekend. Whilst I’m walking around with a full face of make up on, I see women, looking absolutely great with nothing on their face. I think to myself, how lucky are they? They can just wake up in the morning looking great, jump in the shower and go about their day without having to worry about putting any make up on.

Don’t get me wrong, I love putting make up on, not just for the way it makes me feel afterwards, but the actual process excites me. However, sometimes, it is good to let your skin breathe for a while and on a Saturday morning when you’re running to the corner shop to grab some milk, a full face of make-up is definitely not required, particularly when you weren’t planning on going anywhere else for the rest of the day, hence you wasn’t actually going to wear make up in the first place.

So back to this morning. I opened the fridge and sighed. And yes, I jumped in the shower. And then a miraculous thing happened… I got dressed and left the house. I walked to the corner shop with absolutely no make-up on my face, bought my milk and walked back. And do you know what? I didn’t die… I didn’t get chased down the street by people wielding pitchforks and children didn’t scream and run away when they see me.

How did I get to this point in my life? I hear you ask.

Well, let me break it down:

  1. As sad as it may seem, I have realised that no one actually cares that you’re not wearing make-up. You’re worried that everyone will stare at you, like you’re some kind of monster? Let me tell you something, no one is looking at you at all! It’s true, I’m sorry.
  2. You’re walking to the corner shop at 9.30 on a Saturday morning. If you are walking down the street looking like you’re about to hit the biggest club in London, chances are, you are going to get attention, but it will most likely be the attention of people thinking “what an imbecile, where the hell do they think they’re going?” True story – I’ve thought it myself when I’ve seen people do exactly what I used to do.
  3. It’s effort! I just want a bloody cup of tea, why the hell should I waste an hour of my life getting ready to go for a 45 second walk to the shop. It’s, quite frankly, stupid.
  4. This point is important. I grew up. I have realised that there are more important things in life than perfect make up at all times. 9.30am on a Saturday morning when, let’s face it, half the population are still in bed and won’t even see you anyway is one of those times.

Aside from all this thinking I did about how I feel about the laborious task of getting ready to go out and buy some milk, I started to do things at home slightly differently.

  • As soon as I got home from work, a day out or wherever, I took my make up off. This sounds simple right, and to those of you who do this anyway, perfectly normal (I’m guessing you’re the people who are reading this post thinking, wtf) but I never used to do this until the minute before I was going to bed. If I got home from work and had to pop out to the shop or put the bins out, whatever, I didn’t want to be seen without my make up on, so I would wait until I knew that I wasn’t going anywhere to take it off. Absolutely ridiculous.
  • Now, you’ve got that make up off. Every time you go to the bathroom, pass by the mirror, wash your hands etc. you will see your face without make up. If you’re not used to this, it might seem very weird at first. But you will get so used to it after a while that actually, seeing yourself with make up on will seem odd.
  • Take a good look at yourself. I do this all the time without make up on. I will stand in the bathroom and get really close to the mirror and look at my face from every single angle. Yes my face is pasty, yes my eyebrows are so blonde you can barely see them, yes my lips look flatter, my eyelashes not as long. But do you know what? That’s me. That’s what I actually look like! Appreciate yourself. Look at the things you do like about yourself which get covered with make-up. Maybe it’s your freckles, or your rosy cheeks, whatever. The point is, learn to love your ‘real’ self.
  • Take care of yourself. Drink water, eat healthily, cleanse and moisturise your skin. Have you ever not worn make up for 2-3 days in a row and cleaned your skin with a cotton pad? I have and on the third day, make up was still coming off my skin! Not because I wasn’t cleansing my face properly but because that stuff gets into your pores so deep if you wear it every day, that you literally cannot reach it until your skin starts expelling it days later! When your skin is that clean, you may learn to appreciate how you look without make up.

Now, back to the woman you see walking down the street without any make up on. Is she that lucky that she looks so great without having to wear make-up? Maybe she is, but so are you. If you have never allowed yourself to be seen without make up on, how do you know how you will feel about it?

Make up is a great thing, but you are as well. Allow yourself to be seen, not for what you could be, but for what you already are.

me no make up

Strobing; latest fad or best idea ever?

Hey!  I hope you’re all doing well and enjoying your weekend… well, what’s left of it!

So, strobing… what the hell is strobing?  You’ve probably all heard of this latest trend but are wondering where the hell it’s come from.  Let me tell you a secret… it’s highlighting in disguise.  Yes.  Highlighting took it’s little butt down to the Deed Poll office and changed it’s name, expecting us all not to recognise it!

The thing with strobing is, it’s a little bit different.  Please correct me if I’m wrong, but highlighting is literally taking a lighter colour foundation/concealer (shimmer may or may not be included) and using that product to highlight (literally) the high points of your face, where the light would naturally hit, to give it more dimension.  When using this technique, you probably almost always use a darker contour to accentuate the highlight à la Kim Kardashian.  All gets a bit complicated doesn’t it?

Strobing is slightly different.  Instead of using light to attract attention in certain places, strobing uses shimmer.  It makes you look amazingly alive, awake, refreshed, rejuvenated and all that other lovely stuff, but how do you achieve this without looking like a glitterbomb just exploded all over your face?

Firstly, you need to find what type of product works for you.  It could be cream, gel or powder.  Typically, if your skin is oily, I would suggest a powder and if you skin is dry, I would suggest a cream or gel based product.  Of course you are welcome to try all of them, as I’m about to suggest.

What I tend to do when I’m ‘strobing’ is to start of my make up routine by blending a strobe cream with my usual concealer.  Generally, you will use your concealer where you want to strobe, right?  Under your eyes, down the bridge of your nose, on your cupids bow, on your forehead and on your temples.  For the cream, I use this great and inexpensive product by Seventeen called Skin WOW! 3 Way Highligher – part of their Glow & Prime range.  It’s a really nice finish, barely detectable when mixed with a concealer but just adds enough ‘glow’ to know it’s there.

Once I’ve done this I move onto a powder product because who said you had to just use one?!  The product that I use I’ve actually mentioned in a previous post.  It’s by the MakeUp Academy and it’s call Undress Your Skin Shimmer Highligher.  It’s a great colour if you have fairly light to medium skin tones.  I take a small contour brush and lightly dab this product onto the top of my cheekbones (just below the outer corner of my eyes), down the bridge of my nose and on my cupids bow.

Something I’ve learned the hard way through trying various techniques with strobing… less is definitely more and you need to be really careful where you put this stuff because, honestly, it can be mistaken for sweat at a distance and you don’t want people thinking you’re a sweaty beast on a freezing cold day, not a great look!  So my suggestion is, you can go to town quite a lot on your cheekbones (you don’t generally sweat there), however when it comes to your cupids bow, use it sparingly and when it comes to your forehead, use it even more sparingly… if at all!  Honestly, someone has asked my why I’m sweating before when I wore it on my forehead.  If you would prefer to avoid these sorts of questions, follow my advice.  Plus you already have that strobing cream on your forehead mixed with your concealer, so it’s not like you’re totally not inviting your poor little forehead to the strobing party!

Once you’ve finished dabbing the powder on your face where you want it, take a big fluffy face brush, and blend it around the spots where you’ve applied the product so that it isn’t so ‘built up’ and continue with the rest of your face.

There you have it, the perfect, subtle strobe!

So, to summarise; 

  • Strobing is a little joker who changed it’s name from Highlighting to try to trick us all
  • Don’t strobe your forehead

No seriously, I hope you found this post useful.  I know strobing is a hot topic at the moment and I just wanted to give my take on it.  Hopefully my tips will help you to look youthful, rejuvenated and glowing and NOT like a glittery alien.

5 Minute Hair Routines for Monday Morning Madness!

Hello lovelies!

Well, it’s that time of the week again, y’know, our favourite day!

Monday is always a funny one for me because you would think that with all the time you have over the weekend to sort your life out for the following week that you might actually end up waking up on time, having done plentiful amounts of washing and ironing over the weekend.  Yeahhhh…

So I woke up this morning with about 35 minutes before I had to be out that front door… never a fun time when you’ve been out literally all weekend and haven’t even looked at the washing machine, right?

I managed to scrape out some old dress from the back and beyond of my wardrobe… problem one sorted.  On to problem two; my hair.  Oh my god, my hair.  I’m not going to lie to you, my hair is curly.  When tamed in the right way it can look nice.  When left to it’s own devices it can look like Crusty the Clown (what ya gonna do?)  Mostly, if I have the time I will straighten that bad boy until the cows come home to save everyone some trauma.  Today wasn’t that day.

So… what I wanted to just skim over today is Monday morning hair.  I will talk about two routines for when you literally have 5 minutes (or less) to sort that mess out.  Routine one will be what us curly girls can do and routine two will be what those of you with straight hair can do.  Read: the straight version can also be me if I’ve straightened it the night before and I wake up with it stuck to my head.

The reveal.  You’re standing in front of the mirror, eyes to the floor.  You know when you lift your head it’s not gonna be great but you know it’s a necessary evil.  You look up.  OH HELL NO.  It’s so far from great it’s unreal.  There’s two things you can do at this point… you can admit defeat and tie that nest up in a bun on top of your head and just wait for the frizz to appear around your forehead (so attractive), OR, you can use those 5 minutes you’ve got to man up and deal with it.  I’m gonna tell you now, I’ve admitted defeat more often than not but that’s not the way!

Routine One:

Curly Hair

What you will need:

  • Straightener
  • Hair clip (one of those big claw ones to scrape that s*** up)
  • Serum
  • Leave in conditioner

What you won’t need:

  • Brush/comb (believe me)

What to do:

Firstly you’re going to split that hair into 3.  Take two thirds of your hair up (like a half up, half down scenario) and clip it out of the way. (15 seconds)

Take your curling iron/straighteners.  I find whenever I’ve slept on my curly hair, some bits go flat, especially at the bottom.  What you want to do now is find those flat bits that make your hair look so atrocious and curl away.  (1 minute)

After you’ve curled all those bits and bobs on the bottom third, condition it up.  Take a pea-sized amount, rub it between your hands until it’s body temperature and run that through every bit of your hair. (30 seconds)

Take down another third, repeat steps above. (1  minute, 45 seconds)

Take down final third, repeat steps above. (1 minute 45 seconds)

Finally, take that serum and, if your hair is as frizzy as mine is, take maybe two pumps of that and distribute all over your hair.

If your hair isn’t looking half-decent by now, then I don’t do refunds.

Total time: 5 minutes, 15 seconds.  (Soz about the 15 seconds)

Routine Two:

Straight Hair

I would definitely see this as the lesser of two evils!  However, still evil.  The scenario at this stage is that you’ve dragged your butt out of bed, and your hair is stuck to your head in some nasty, greasy eugh way.  Maybe you should have washed it last night, but you got busy chilling so you didn’t.  (Happens to me regularly).

What you will need:

  • Brush/comb (need that this time, trust me)
  • Straightener
  • Dry shampoo

For speed purposes, you don’t need to split your hair.  What you’re going to do instead is take your brush/comb (paddle brush is honestly the best one to use) and simultaneously, using the brush and the straightener, work that down the lengths of your hair from the root to the tip, like you’re double brushing it.  To break that down for you, take the brush first and brush down the hair and literally 1-2 inches behind it, swipe the straightener down.

Keep doing this until your hair looks straight.  Read: looks straight.  Every single strand of hair doesn’t need to be poker straight.  If you are here to learn how to straighten your hair to the maximum, ain’t nobody got time for that.

Once that step is done, take that dry shampoo and, lifting 2-3 inch sections, spray it everywhere.  Like… everywhere.  You need that in your life asap.  After you’ve emptied the can, rub it in just as if you were shampooing and then brush it out.  That’s it. The end.  (Seriously though, don’t put that much dry shampoo in your hair, can get a bit expensive and you will look like a Grandma).

Total time: 5 minutes (if that)

That’s it guys.  My 2 quick morning routines for when you’ve snoozed that alarm hardcore.

P.S. Of course, before using any heated styling tools, you will protect your hair with heat defence spray or whatever blah blah 🙂